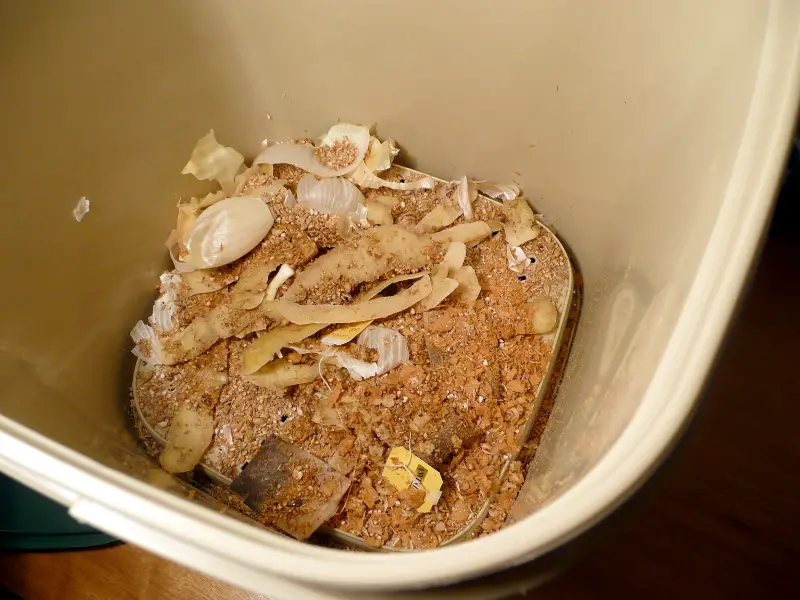
Making a DIY bokashi bucket is easy and requires minimal equipment, materials, and resources. For instance, an electric drill is all the machine needed in this project. You’re set to go if you have two 5-gallon buckets, a lead, and a bokashi inoculant.
Here are the steps to DIY a bokashi bucket:
- Step 1: Select two buckets with the correct fitting
- Step 2: Prepare the first bucket by drilling drainage holes
- Step 3: Nest the buckets leaving an air gap between the bottom of the bucket with holes
- Step 4: Start layering the food scraps generously, adding bokashi bran
- Step 5: Cover the bokashi bucket with an airtight lid
- Step 6: Let the fermentation process progress for about two weeks. Affix a spigot for easier draining
Table of Contents
What is a Bokashi Bucket?
Bokashi is Japanese slang for “fermented organic matter.” It’s a home composting process that uses layered bokashi buckets to ferment food waste with an inoculant (such as sawdust or an effective microorganism) and create a super-fertile compost pile.
The final nutrient-rich product is used in the garden soil to facilitate healthy plants and veggies.
Although most homes have a composting bin, the bokashi bucket is ideal for composting “non-compostable” kitchen scraps like dairy and meat.
The Bokashi system is an excellent alternative to a worm farm or can be combined to hasten vermicomposting.
Bokashi buckets hold more food scraps, can be used indoors, and shortens the fermentation process to just a few weeks.
The best part is that you can buy one from amazon or DIY your bokashi bin—the latter is simple and cheaper.
How To Make An Inexpensive Bokashi Bucket
Making a bokashi bucket is an easy 5 step process. Besides, it’s a great way to recycle empty buckets at home.
For the best outcome, pick good quality items that will last longer instead of frequent repairs.
What you’ll need:
- Two 5-gallon buckets
- Sealable lids
- Inoculated bokashi bran
- Drill
- A spigot (optional)
Instructions:
Step 1: Get the right bucket fit
Ensure the buckets will tightly and neatly fit, leaving an air gap space between the base of the outer and inner buckets. This is the storage space for your bokashi tea.
Step 2: Drill drainage holes
Turn the inner bucket upside down and drill about 20 holes at the base. The hole size depends on the drill bit—it can range from 1/8 to ¼ inch.
Step 3: Assembling the buckets
Nest the first bucket with holes inside the solid one without holes.
Step 4: Add the food scraps
Place your food waste and bokashi inoculant in the bucket.
Step 5: Covering with an airtight lid
Whether using a Snap-On lid or paint bucket lids, ensure it provides a perfect airtight seal. Paint bucket lids are hectic to clean and slightly expensive compared to Snap-On lids.
However, both work well provided no air gets in the bokashi bucket system.
Step 6: Add a spigot (Optional)
Affix a tap at the base of the bokashi bucket for easier collecting or draining the compost tea.
Here’s a very useful video to watch on how to DIY bokashi.
What Can You Compost In a Bokashi Bucket?
You can put all your kitchen scraps like veggies, fresh fruits, cooked and uncooked food, cheese, bread, coffee grinds, and kitchen tissues in the Bokashi bin.
Avoid adding large bones or shred them into tiny pieces to accelerate decomposing.
Prioritize adding food waste with more nutrients, like fresh fruits and veggies, for a more nutrient-dense bokashi juice. These items also accelerated the fermentation process.
Although garden waste like cut flowers is compostable, they provide little nutrients and take up more space in your compost bin, best in limited amounts.
Adding pet waste to the bokashi bucket accelerates the process and gives off more nutrients to the final product.
However, compost at high temperatures to destroy pathogens; otherwise, it’s not a good idea in winter.
What You Should Not Add To Your Bokashi Bucket
Excess liquids: Limit excessive liquids like water, oil, vinegar, juice, and milk.
A high moisture level in your bokashi bucket prevents the proper working of beneficial microbes hindering the fermentation process. This could possibly lead to food scraps rotting instead of fermenting.
Rotten or food with molds: Avoid putting foods with blue or green molds as this accelerate the rotting of bin contents.
Contrary, white molds like apples and grapes are fine occasionally.
What Organisms are in a Bokashi Bran?
Organisms in bokashi bran initiate and accelerate the fermentation process to keep the compost pile from rotting or smelling bad.
Bokashi bran contains three families of effective microorganisms to work on your food waste effectively.
They include:
Lactobacillus: This species is a probiotic for humans used in fermenting foods like yogurt, and it’s an important element in the bokashi bucket system.
Saccharomyces: This is yeast species common in fermenting processes like beer brewing and bread making. It’s beneficial in breaking down protein in different food scraps in the bokashi process.
Rhodopseudomonas: It’s a natural-occurring soil bacteria that break down carbon dioxide into biomass in bokashi.
Do Bokashi Bins Smell?
Bokashi bins produce a slightly acidic smell which is normal and non-irritable in most cases.

